A Layman's Guide to Setting up Mutual TLS on Nginx
Learn to set up Mutual TLS on Nginx

Ever heard of Mutual TLS? It might sound a bit jargony, but don’t worry, I’m here to break it down for you. In simple terms, it’s like a secret handshake for your web server and its visitors. In this post, we’ll walk you through setting up Mutual TLS on Nginx. So, let’s get started!
Mutual TLS in a Nutshell
Mutual TLS, or mTLS for short, is a fancy way of saying both the server and the client have to prove their identity before they can start exchanging secrets. It’s like showing your ID at the door of an exclusive party.
Step 1: Getting the Right Papers
Before we dive into the technical stuff, we need to generate the certificates. Think of these as the ID cards for your server and clients.
Server Certificate
You’ll need a certificate for your server. To generate it, open up your terminal and run this command:
openssl req -new -newkey rsa:2048 -days 365 -nodes -x509 -keyout server.key -out server.crt
This will create a private key and a self-signed certificate. Remember to fill in the details, especially the Common Name, which should be your server’s domain name.
Client Certificate (Optional):
If you want to authenticate clients too, you’ll need another set of certificates. Run this command:
openssl req -new -newkey rsa:2048 -days 365 -nodes -x509 -keyout client.key -out client.crt
Step 2: Getting Nginx in the Loop
Next, let’s configure Nginx to recognize these certificates. Imagine this as teaching your dog a new trick.
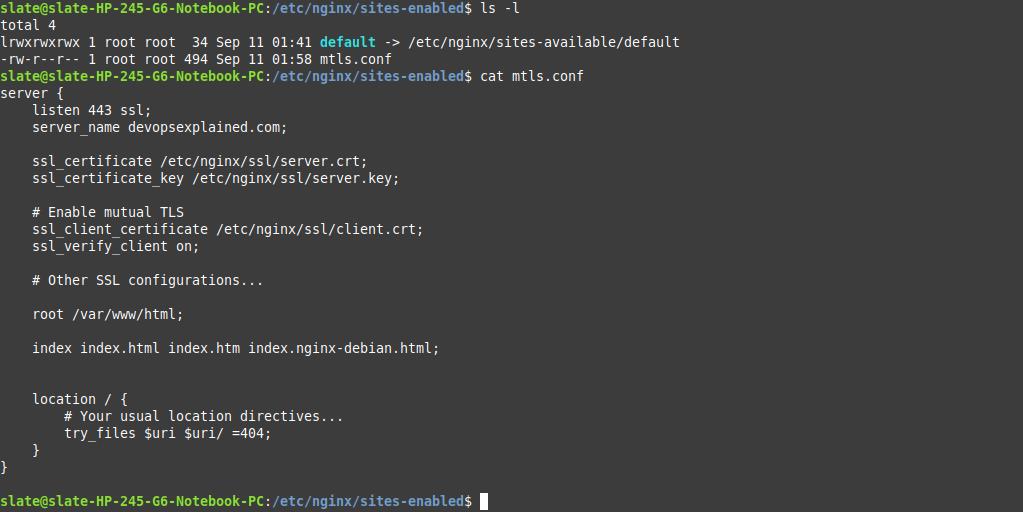
Open your Nginx configuration file. It’s like the blueprint for your web server. Add the following code:
# nginx config
server {
    listen 443 ssl;
    server_name your_domain.com;

    ssl_certificate /etc/nginx/ssl/server.crt;
    ssl_certificate_key /etc/nginx/ssl/server.key;

    # Enable mutual TLS
    ssl_client_certificate /etc/nginx/ssl/client.crt;
    ssl_verify_client on;

    # Other SSL configurations...

    location / {
        # Your usual location directives...
    }
}
Here’s the breakdown:
- listen 443 ssl;: This tells Nginx to listen on the SSL port (443).
- ssl_certificate and ssl_certificate_key: These point to your server’s SSL certificate and private key.
- ssl_client_certificate and ssl_verify_client on;: These enable client authentication.

Step 3: Restarting Nginx
Once you’ve added the code, save the file and restart Nginx using:
sudo systemctl restart nginx
Step 4: Welcoming the Clients
If you’ve set up client certificates, make sure to hand them out to your clients and guide them on how to use them.
Verifying the setup
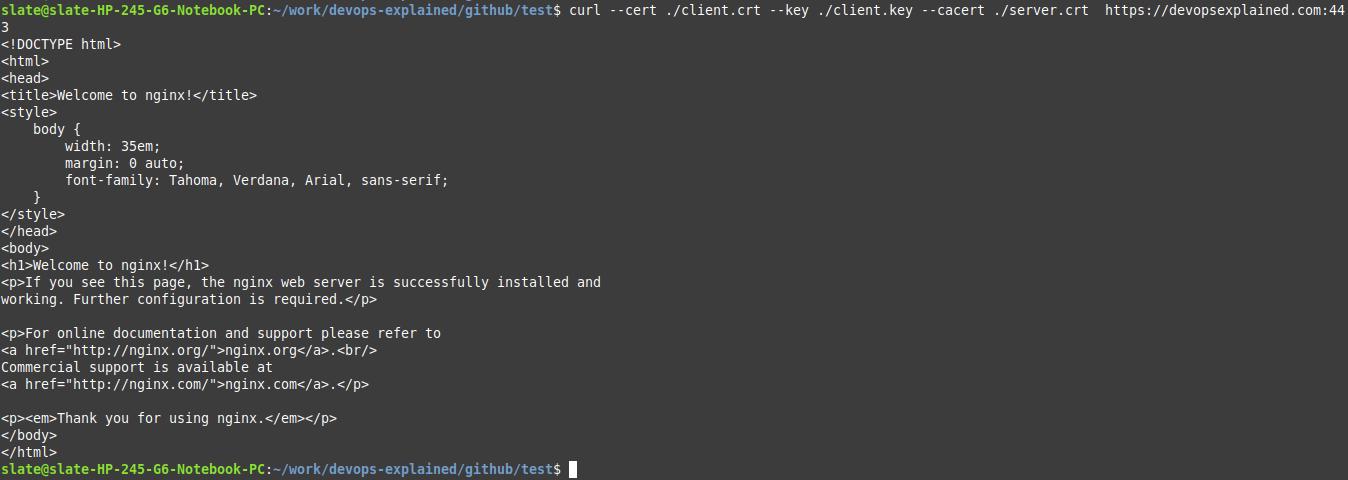
We will run the curl command to verify the setup.
curl --cert ./client.crt --key ./client.key --cacert ./server.crt https://devopsexplained.com:443

And that’s it! You’ve just added an extra layer of security to your web server with Mutual TLS.
Remember, this is just a starter guide. Depending on your specific needs, you might want to consult with a security expert or dive deeper into the documentation.
Until next time, happy secure surfing! 🌐🔒
